
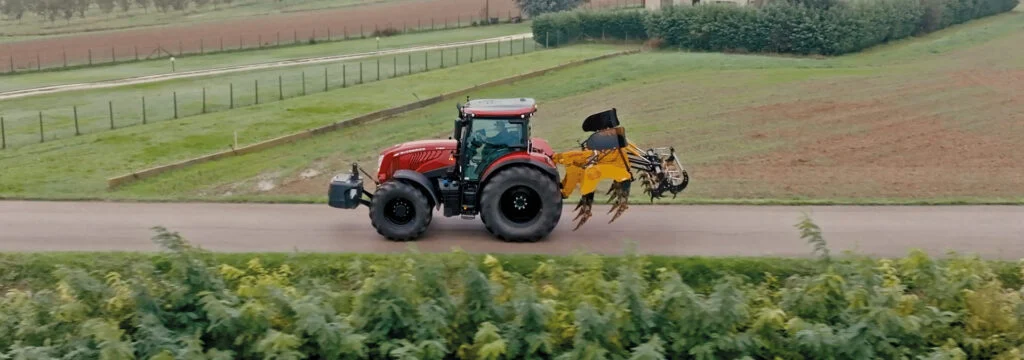
A subsoiler can transform a field with a hidden compaction problem, letting water drain and roots reach deeper moisture and nutrients. Used in the wrong place or at the wrong time, though, it burns fuel, damages soil structure and can leave you worse off than before.
Autumn, after harvest, is the natural time to check for soil compaction and decide whether to act. This guide takes you from spotting the signs and digging a pit through to working depth, leg choice, conditions and the follow-up that keeps the soil open.
Signs of soil compaction
Compaction builds up from heavy machinery, grazing and working land when it is too wet. It often sits out of sight, so watch for clues on the surface and in the crop:
- Water ponding on the surface or lying in tramlines long after rain.
- Run-off and soil wash on slopes and down wheelings.
- Patchy, yellowing or stunted crops, especially on headlands and gateways.
- Roots that grow sideways, thicken or stop at a certain depth.
- Cultivations needing more power or leaving large, cloddy lumps.
None of these prove there is a deep pan on their own. Surface compaction in the top few centimetres needs a different fix from a plough pan lower down, which is why the next step matters.
Dig a pit before you reach for the subsoiler
The spade is the cheapest soil test you own. Before you hitch up a subsoiler, dig a few pits in good and poor areas of the field and compare them:
- Dig a pit deep enough to go below any suspected pan, with one clean vertical face.
- Look at the structure from top to bottom: crumbly, rounded aggregates are good; dense, flat, platy layers are not.
- Push a knife or the spade into the face at intervals and note where resistance suddenly increases.
- Follow the roots. If they bend sideways or bunch up at one level, you have found the restriction.
- Smell the soil. A sour or stale smell and grey mottling point to poor aeration and waterlogging.
- Measure the top and bottom of the compacted layer and record it for each pit.
The AHDB GREATsoils resources include practical guides to assessing soil structure in the field, which are well worth following.
When to use a subsoiler
Only reach for the subsoiler when your pits show a real compacted layer below normal cultivation depth. If the problem is in the top few centimetres, shallower cultivation or simply better traffic management may be enough.
Timing is the next decision. Subsoiling works by lifting and shattering the soil so it cracks along natural lines. That only happens when the soil at working depth is dry enough to break. Squeeze a handful from the pan depth: if it crumbles, conditions are right; if it smears or rolls into a sausage, wait. Late summer and early autumn, before the rains return, are often the best window.
Consider the cost as well. A subsoiler pass is slow, fuel-hungry work, so target the areas your pits flag, such as headlands, gateways and tramlines, rather than treating whole fields by default. Mapping problem zones as you dig makes this much easier.
Setting the right working depth
Set the points just below the bottom of the compacted layer you measured in your pits. Going deeper does not add benefit. It needs more power and fuel, slows you down, and risks bringing poor subsoil up into the topsoil.
Running a subsoiler too shallow is just as wasteful. The points pass through the pan without lifting it, and you pay for the fuel without fixing the problem. Pans are often deeper on headlands and around gateways, so recheck depth as you move across the field.
Check the depth on the move, then stop and dig behind the machine. You want to see cracking and lifting across the full width between legs, without big, unbroken blocks or smeared channels. Adjust leg spacing or depth until the result is even.
Subsoiler leg types and set-up
Leg and point design
Straight, rigid legs on a subsoiler are robust and simple, and they lift and fracture a lot of soil, but they also bring more disturbance to the surface. Curved or low-disturbance legs, often with wings on the points, shatter the pan while leaving more of the surface intact, which helps on grassland and in min-till systems.
Protection, spacing and rollers
Shear bolt protection is cheap and effective in stone-free fields; auto-reset legs save time on stony or variable ground. As a guide, leg spacing should relate to working depth, so the zones of disturbance overlap. A rear packer roller helps reconsolidate the surface and leaves a level finish for drilling.
Matching the machine and tractor
Dondi, founded in Italy in 1850, makes soil tillage machinery including subsoilers, rotary ditchers and cultivators. Conagri offers Dondi subsoilers and tillage equipment with sales, service and parts support. For deep cultivation on larger farms, Valentini soil preparation equipment includes deep-working RIPPER cultivators, with the agriculture range covering tractors from 30 to 600 HP.
Subsoiling is one of the heaviest draught jobs on the farm, so the tractor needs enough power and traction. McCormick tractors from 49 to 310 HP are available from Conagri to match the implement to your soils.
Follow-up: keeping the soil open
Freshly loosened soil is weak and easy to compact again. The first few passes after subsoiling decide whether the work lasts, so plan what follows:
- Keep traffic off loosened ground when it is wet, and stick to tramlines where you can.
- Lower tyre pressures and use wider tyres to spread the load.
- Establish a crop or cover crop quickly so roots stabilise the new fissures.
- Add organic matter such as farmyard manure or compost to build structure over time.
- Check that field drains and outfalls are running, so water can leave the loosened layer.
Dig again the following year. If the pan returns quickly, look at the root cause, whether that is heavy machinery, grazing in wet weather or working the land too soon after rain.
On grassland, compaction from livestock and silage traffic usually sits shallower. A low-disturbance machine working in late summer or early autumn, when the sward can recover before winter, gives the best results with least damage to the grass.
Getting the right subsoiler for your farm
The best subsoiler is the one you use only where pits prove you need it, at the right depth and in the right conditions. Matched to your tractor and soil type, it can restore drainage and rooting for several seasons.
To compare Dondi and Valentini options or browse our wider agricultural equipment range, contact the Conagri team, call +44 (0)1392 984258, or visit us in Crediton, Devon.
Frequently asked questions
When should you use a subsoiler?
Use a subsoiler only when you have confirmed a compacted layer by digging, and when the soil at working depth is dry enough to crack and shatter. Late summer and early autumn after harvest are often the best window. If the soil smears or moulds like plasticine at depth, wait, because subsoiling wet ground can make compaction worse.
How deep should a subsoiler go?
Set the points just below the bottom of the compacted layer, which you find by digging a soil pit. Working deeper than needed uses more fuel and power, slows you down and can bring poor subsoil to the surface without any extra benefit. Recheck depth across the field, as pans are often deeper on headlands and gateways.
How do I know if my field has soil compaction?
Look for ponding after rain, run-off, poor crop growth in wheelings and headlands, and roots that turn sideways. Then dig a pit and examine the soil profile. Dense, platy layers with few cracks or roots, a sour smell and resistance when you push a knife or spade in all point to a compacted layer.
Which subsoilers and deep cultivators does Conagri supply?
Conagri offers Dondi soil tillage machinery, including subsoilers, rotary ditchers and cultivators, and Valentini soil preparation equipment, including deep-working RIPPER cultivators. Both come with full sales, service and parts support. McCormick tractors from 49 to 310 HP are also available to match the implement to your power needs.